December 20, 2010

Use up some scraps! Wrap a box!

If you're like me, you always have a ton of scraps and you're too stingy to throw them away :)  I cannot bring myself to get rid of paper....I love paper.  I am a total, complete, paper addict.  They should have a support group for people like me, LOL!

I am making monogrammed ornaments for everyone in my family this year.  I purchased kraft boxes to put them in.  Well, because I don't want just "kraft" colored boxes, I was going to wrap them.  Then I decided that I had some Christmas paper from my scrapbook stash left over and why not use that?  So I took some measurements and cut a few pieces and used my ATG gun to adhere them to the box, cut out a few decorations, added the initials and a bow and TA DA!  I don't have enough Christmas paper scraps to do all my boxes (since I'm doing about 20) but still I like how simple it came out.

The paper is Cosmo Cricket, as are the picture embellishments on the side.  The letters are Thickers....pretty glitter ones, and then just some silver cord I had in my stash.


December 18, 2010

Christmas Gift Idea: Stamped Candles

I hope everyone is having a good weekend so far.  I spent my Saturday getting up and going to work (I don't normally work on Saturdays but due to the weather here Thursday I wanted to make up some time rather than use vacation) and when I got home I was so exhausted.  I put my 2 yr old down for a nap and preceded to take a nap myself.  My husband let us both sleep for FIVE HOURS!  Wow I must have REALLY been tired!  Shortly though I'm going to step away from the computer and work on my family Christmas gifts.  Both my mom and mother-in-law recently acquired cricuts and I'm also pondering shopping for a good cartridge deal.  Just don't know if I could get it by Christmas or not :(

Anyway, today I have a cool cricut-less project to share for you that as made as gifts for 2 of my co-workers.  Next week I'll have another similar project where I make a matching set and matching packaging, but for today we'll stick to the candle.

Did you know that by using a few things you may already have around the house you can make awesome, super easy, decorated candles??  Well you can!  Candles can be expensive but there are several online sites where you can get them pretty cheap.  The sets I'm making next week involve using online purchased candles, but for this I just picked up a pack at Meijer.  It was $5 for the set of two.  White and Cream colored candles work the best.  I haven't experimented too much with other colored candles but if you do, let me know as I'd love to see what kind of results you get.  In addition to candles, you need tissue paper, wax paper, stamps of your choice, ink pads in the colors you prefer to use, and a heat gun.  A blow dryer will not work for this.


Since this was Christmas themed, I chose a stamp set from Clear Dollar Stamps called Holiday Patterns. The ink I used was from their Clearly Coordinating Collection in Spring Leaf, Wild Huckleberry, Deep Sea, Turquoise Gem, and Bubble Gum.

First I measured my candle and cut a piece of tissue paper that would fit around the candle exactly.  I then cut a piece of wax paper larger that when wrapped around the candle would completely cover all the tissue paper.  You place the tissue paper in front of you and stamp away!  Anything you'd like...this can be decorated in any way you choose.  Once you've stamped all over the tissue paper and you're happy with how it looks, wrap the tissue paper around the candle.  Then wrap the wax paper around the candle over the tissue paper as tightly as possible.  Secure the wax paper down with a piece of tape.  Next you take your heat gun and run it over the wax paper.  You will be able to see the tissue paper change.  Keep the heat gun moving though.  Spending too much time in one spot can cause it to melt too much wax out of the candle and make pits and bumps in the candle.  Believe me, I've found this out the hard way in the past.  When you've gone all the way around the candle, turn off the heat gun and roll the candle on a hard surface.  Next remove the tape and was paper and VIOLA!  A perfect, pretty, festive candle that anyone is sure to love!  Here are some pictures of my finished candles.  Feel free to leave comments.  I love comments!  To see a video tutorial of this technique, My Pink Stamper has a great one.....it's Episode 38.  This is where I learned how to do it.  I love all of Robyn's videos, but I think this technique is my favorite :)


December 16, 2010

Apologies...it's been too long!

Hello craft world!  I have been somewhat MIA.  After looking at my blog today I realized I have not posted in 3 months!!!  Oh my....where did all that time go?  I have been hard at work on some awesome projects.  And I have even been looking into doing my very first video.  Just trying to figure out exactly how that's done :)  I have a few things to share today.

This time of year is super busy, but this year was especially busy because my family was VERY involved our churches production of "The Christmas Post".  If you've never seen this musical, it is truly something special and SO much time and effort went into making it a success.  My family and I live in a pretty small town and pulling this off really impressed everyone in our community.  They are already talking about next year!  Being a part of it was truly a blessing, but it was a ton of work.  We spent nearly every weekend at chuch and two weeks before the performance, nearly every day!  Here is a video of one of our songs from the show.  If you ever get a chance to be a part of something like this, I highly recommend it.


Now that all that is done, I have also had a ton of things to do to get ready for Christmas.  Like many, the economy has really had devastating effects on my family.  I am SO blessed and thankful to God that we have been able to continue on this long keeping food on the table, a roof over our heads, and utilities paid.  Tax time can't get here soon enough! :)  So due to our money situation, this year is going to be a lot of homemade Christmas. 

I've always bought all of our gifts and have never tried to undertake a big project like this.   I now know why everyone does just buy things.  It's so much easier!  But it's also so much more special.  Over the next few days I'll be sharing with you the Christmas projects I've been working on. 

Last week, we had a Christmas party for our cub scout pack.  We have a very large pack, and every year at our Christmas party, Santa visits and gives the boys presents.  I wanted to have something for the siblings too so I made goodie bags for all of them.  I did 20 goodie bags.  Here's a picture of them:


To make them, I just filled cello bags from Clear Bags (size 3.75" x 6") with a variety of miniature candy bars and made toppers for them.  The toppers are from last year's DCWV Christmas stack cut at 4x2 and folded in half.  The layer used paper from both the DCWV Christmas stack and Cosmo Cricket.  The stamp was from Clear Dollar Stamps "Christmas Blessings" set (I LOVE their stamps by the way.  Check out their website, the stamps are inexpensive and awesome quality) and the ink is from their Clearly Coordinating Collection in Spring Leaf and Red Velvet Cake.  The images on the bags are from Cricut cartridges Paper Doll Dress Up and Create a Critter.  It probably only took about 2.5 hours to make all the bags from start to finish.  Not bad!

I hope you enjoyed this post for today.  I'll have another post either later today or tomorrow.  I have so many things to post.  I promise I won't be so far away from now on.....and keep in mind that I'm still trying for 100 followers.  If I get there, I'll have a Cricut cartridge giveaway!!!

Happy crafting!

September 17, 2010

It's embarrassing how far behind on scrapbooking I am....

Yes, it's true.  I am so super far behind on scrapbooking that it isn't even funny!  And you'll see just how far behind I am in a few.

First, I wanted to say how lucky I was to be one of the first members of the new Club Ruby.  It is really exciting to get a kit in the mail at the beginning of each month and I have promised myself that I will use this kit to help catch up on my scrapbooking!  Many times I buy material and end up only making cards or other projects and never create a single layout.

The kit from August included paper from Sassafrass Lass and it was very summery! Not that that is even a word, but oh well.  I created this layout to put on some of my summery pictures on :)

yep, that says 2004....six more years of layouts to go!

September 1, 2010

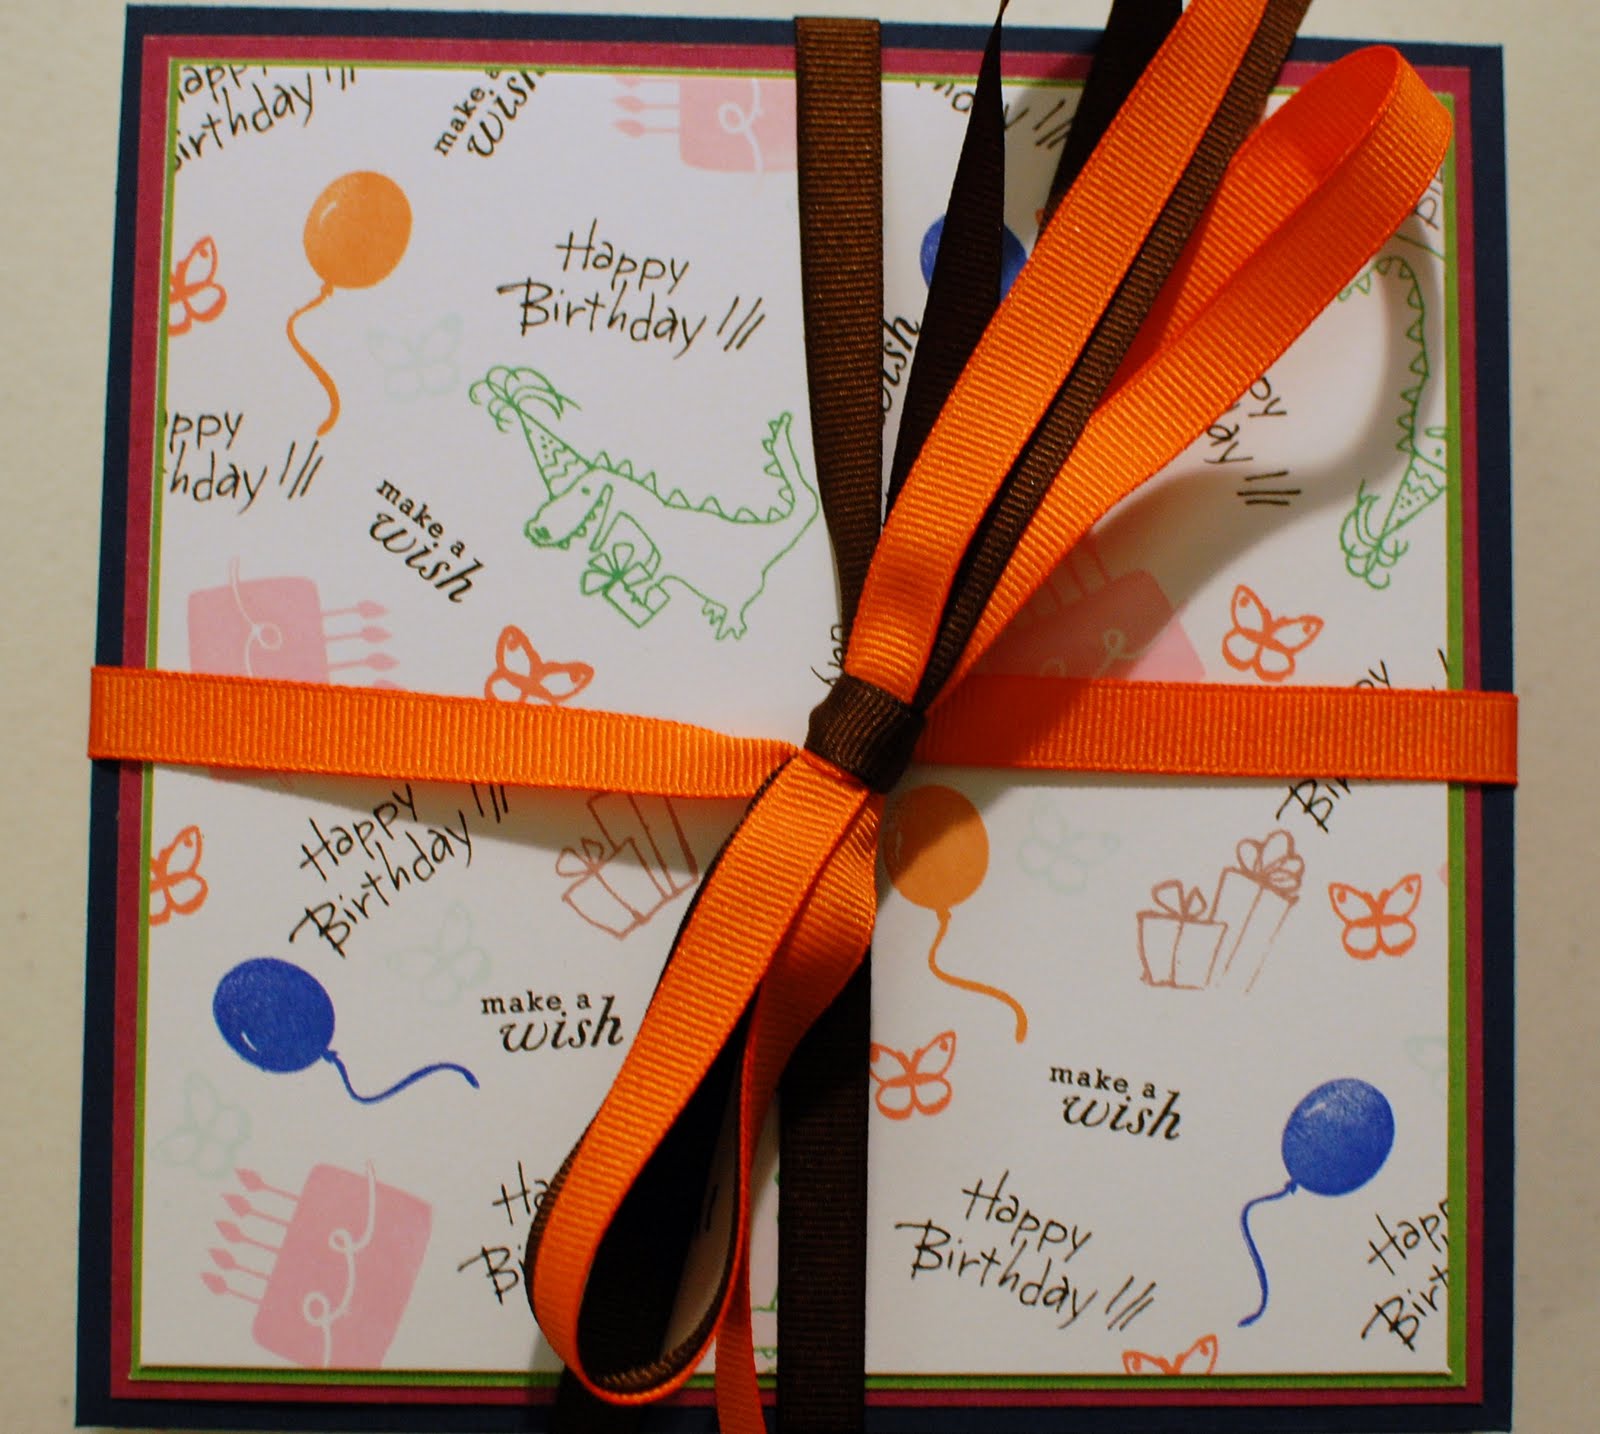
I am excited to once again be the guest designer on The Bug Bytes!  I realize that the cartridge of the month is Robotz, however, I don't own that cartridge so I chose to do use the August cartridge, Just Because Cards. I love making cards and I love giving sets of cards to people. When this cartridge came out I just had to have it and I got it! Here are the cards I made from the cartridge:


In a Pickle?, You Take the Cake, You are my Sunshine, and Apple of my Eye. These are just cards I made up to use when I needed something fast. All four cards were made in a little over an hour. Most of the paper was from my stash of My Mind's Eye and DCWV. I kept them really simple because I wanted to make a box to put them in. Card sets are so cute and this cartridge is great for making sets.

I saw a tutorial on you tube for a box and it was so easy! The best thing about it is that I didn't have to buy clear boxes to put my card sets in anymore. Here is how you make it. You will need a sheet of cardstock, something to score the cardstock, scissors, bone folder, adhesive, and corner rounder.

You start with an 8.5x11 sheet of cardstock...you need a sturdy kind because it will be a box :)
Put the cardstock portrait, and score it at 1", 1.75", and 7.75". Then turn it landscape and score it at .75", 5.25", 6" and 10.5". After that, fold on all the score lines. It should look like this.

Next you will place the sheet portrait with the double score line on the left. Cut out the bottom left two tabs. Then also cut out the top four tabs. See picture. It's a little hard to explain.

Then cut out the bottom right tab, and make slits only down the rest of the right side.

Place adhesive on the back of the top right tab, and the back of the small tab on the right in the middle. Then place adhesive on the front bottom tab, and the bottom right.

Peel off the backing and stick the box together.

To make it fit together more easily, the opening tab at the top should be rounded. This will make it much easier to open and close.

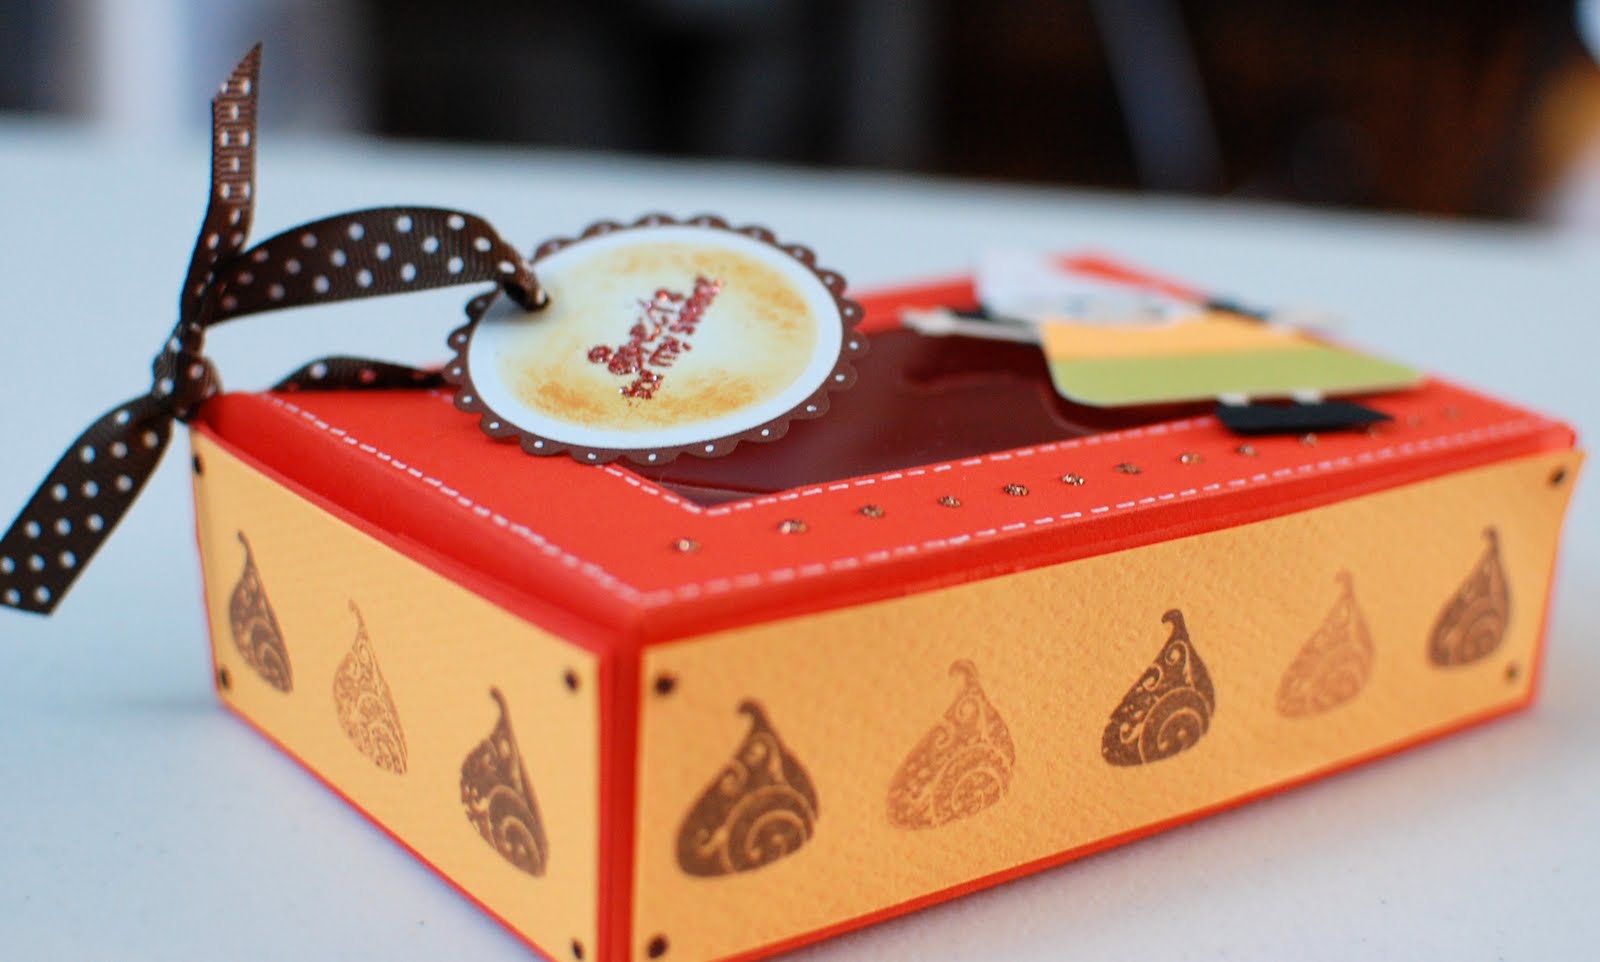
When you are done you can decorate it any way you choose. For my box, I chose some scraps that were left from making my cards. Since these are "Just Because" cards, I decided to make a label that is "just bee cause" and put a little bee on it. The background and the bee and the ink are from Clear Dollar Stamps. The sentiment is from Papertrey Ink. The box will hold at least 6 cards and envelopes depending on how many embellishments you have on them.
I hope you've enjoyed this project. If I make it to 100 followers I'm going to do a giveaway!
Happy Crafting!
Amanda :)

August 30, 2010

I am a little sad today, but it's been a really long day.  Issues at work are taking their toll on me, and I had too much to do when I got home to craft! 

Unfortunately, I didn't any links to submissions for the challenge so I won't be able to give the stamp set away.  But thank you everyone for the wonderful comments on my box.  I will keep looking ahead for the 100 followers.

Here are some things I've done over the last few weeks.  One of my end of summer projects was to clean up my craft room.  In the process I decided to use up all my scraps.  I literally used everything I had that was big enough to make a card and ended up with seven cards.  They are pretty blank but they are a start to my card stash.  Next time I need a quick thank you card, i won't have to start from the beginning....which will be SO nice.
Some of them came out really neat looking.

I also have my July DT project for Scrapper's Delight to share with you.  I used one of my pre-made cards in the picture above and paired it with the cutest digital stamp.  If you've never been over there, you should visit Bugaboo stamps.  They are so adorable and there is such a wide variety of styles of stamps.  I chose the fat mouse and colored it in with my copics.

When I wasn't paying attention, I put the stamp on....and it came out crooked.  But oh well.  That just gives it the handmade look. :)

I hope everyone is having a good evening.  I have to get back to what I'm doing.  It's my husband's birthday today and I didn't even make him a card!!  He knows what kind of stress I've been under and like the wonderful man he is, doesn't seem to mind at all.  But I do have brownies in the oven that should be ready when he gets home :)  So at least I did a little something, even if it was last minute. 

Wednesday I am the guest designer on the Bug Bytes and I'm working on a super cute project that I'm going to finish up tomorrow!

Good night all!

August 28, 2010

Challenge Ends Aug 29th!

There is still time to make a creation for the Scrapper's Delight Sweet as Candy Challenge!  It ends on August 29th so be sure to visit their blog here to get your entry in.  And keep in mind that I will also be choosing a winner from my own blog to someone who leaves me a link to their creation for the challenge.  And since there aren't many entries, your chances of winning a new cute stamp set is pretty good!  So get those entries in!  I'll be back later today with a few of my latest projects :)  My craft room and I have a date!

Happy crafting!

August 21, 2010

Want a chance to win a prize??

It's the SWEET AS CANDY challenge on Scrapper's Delight! 

If you've come here from their blog, then welcome!!  To find out what this is all about, please visit their blog here.  If you hop on over there, you will find links to all of the awesome project for the design team.  The inspiration for the theme of this challenge comes from snacking while crafting.  What do you all snack on when you craft?   Personally I tend not to simply because it drives me nuts getting stuff on my fingers (like potato chip grease).  Just a thing of mine anyway :)

Now, onto the project I created.  For this challenge, I pondered over what to do for awhile.  Many times I tend to make cards but I wanted to do something a little different.  My husband's birthday is coming up next week and he LOVES Recee Cups (however you spell it) and I tend to get him a bag to go along with whatever gift I give.  So, since we're thinking candy for this challenge, I decided to make him a cool container and put them in there.  Here it is:


This box is 3.5"x5"x1.5".  I started with an 8.5x11 sheet of cardstock and just went from there.  The top is actually hinged so it's kind of like those doughnut boxes.  I kept the colors similar to what would be found on the candy I was putting in it...unfortunately I did not have time to get to the store to buy candy to put in it before I had to send off my picture.  The little candy corn (isn't it just adorable?!?!?) is from the cricut Mini Monsters Cartridge.  BTW, there are a ton of cool cuts on that cartridge.  With Halloween coming up I'm definitely going to explore some more projects with it.  Other supplies I used were cardstock (from my stash and scraps....no idea what some of it is), stamps and ink are from Clear Dollar Stamps, Stickles, and the circle and scallop are some Nestabilities dies I just got and had to try out.   Oh, and I used a glue pad and Martha Stewart glitter for the tag. 

To be eligible for the Scrapper's Delight giveaway, you'll need to enter on their blog.  I also wanted to give something away to another lucky person who follows my blog.  After going through my stamps, I have an extra, brand new set of Fiskars stamps.  It's a coffee/tea set that I just thought was adorable.  To be eligible to win this stamp set, please leave a comment on this post with a link to your creation for the Sweet as Candy challenge.  So for those participating in the challenge on the Scrapper's Delight blog, just also let me know where to find your project and you might win these stamps! 
If I can make it to 100 followers, I will do another giveaway of a Cricut Cartridge.  So please follow me!!!
Here are some other pictures of my project.  Thank you for stopping by!

August 2, 2010

Winner of Joy's Life Stamps!

It is Monday!  I am sorry for the delay in posting this.  I have been at work all day and have to do the mom thing when I get home.  Thank you all for your patience and nice comments.  I am slowly but surely making my way to 100 followers. :)  It will be so exciting if I reach it and get to give something else away!

The winner of Joy's Life "Lots of Pun" stamp set is:

Mary Beth!!

mbchoj said...


What an adorable card! You used a great cart and stamp set. If I don't when will need to buy them both.Mary Beth

I will be contacting you for your information so Joy can get the stamps out to you.  Thank you for everyone who played along!

July 31, 2010

From OWL of us - Thank you card

First I just want to say another thank you to everyone.  It was inspiring to have so many more followers and wonderful comments than I ever had before.  If you haven't yet, you visit my post here where you can comment for a chance to win Joy's Life "Lots of Pun" stamp set.  I'm also still hard at work trying to reach 100 followers.  If/when I get there I'll choose a cricut cartridge to give away.  Not sure which one yet since there are so many great options, but it'll be a good one, I promise!

I have a whole pile of thank you cards to make.  Today was a big day for my son's cub scout pack as we had a huge field day.  My husband and several other leaders have really been working hard for months to put all of this together and it was so successful.  We're hoping it becomes an annual event.  And what boy wouldn't have fun being sprayed down by the fire department?  I managed to stay dry.  It was an event held at our local high school and we want to send the principal a thank you card.  The school donated not only the use of the field (which is typically being used for football practice at this time of year) but also the time of the school employee who had to sit with use all day.  They could have made us pay his overtime but they didn't.  So he'll get a thank you card too since if he hadn't been available to be there, we wouldn't have been able to use the field!  Anyway....enough babbling and onto the project. 

This is the card I made for the principal.  This is one of the few cards I have ever done where I added almost no embellishment.  It is all paper and nothing else.  No ribbon, no stickles, no brads or buttons....not even a single stamp!  I used the Straight From the Nest Cricut cartridge which I LOVE LOVE LOVE!  The owl, the branch, and the phrase were all on the cartridge.  The phrase has some very thin words on it.  If I had done this over again I would definitely use a more dense cardstock.  Most of the cardstock was from the DCWV Flower Shower stack. The plain textured cardstock is from Couture Cardstock.  The pink was ran through my Cuttlebug using the D'vine Swirl folder.  And that was it...simple simple.  I even decorated the inside but forgot to take a picture of that part and its really late and I'm exhausted.  Anyway, enjoy the card.  :)

July 29, 2010

Overwhelmed!

I cannot believe the response I've had on my blog since yesterday morning!  You all are amazing.  Thank you, thank you for the wonderful comments. 

When I started my blog, I didn't do it to get followers, I just wanted to be a part of this fabulous community of people that enjoy crafting as much as I do.  I get so much inspiration for everyone else and if I can inspire even just one person, it just makes my day! 

If I get to 100 followers, I will do another giveaway....maybe a cricut cartridge??  I don't want to get ahead of myself, but secretly I do hope I get more followers and I'd love to give all of you another chance to win something.

Again, thank you for the comments and the support.  It means so much to me.

Happy Crafting!

Amanda

July 27, 2010

Day 3 Joy'sLife.com Give-A-Way!

Hello crafting community!  I cannot believe it has been so long since I've posted a project but I suppose life does get in the way.  What better way to make a come back than to be a part of the Joy'sLife.com give-a-way!  Wednesday is Day Three and you could be the lucky winner of a brand new, awesome Lots of Pun stamp set!

First, here is the project I made for you all today.  This was done using the Lots of Pun stamp set "cute as a bug" stamp and the Paisley cricut cartridge.  The heart stamp in the background is also in the Joy's Lots of Pun stamp set.  These stamps are so versatile and work well for tons of projects. 


Now, onto the exciting part!  Joy is going to be giving one lucky commenter on my blog a set of these stamps!  All you have to do to be eligible to win is leave a comment on this post with a way to get a hold of you.  I will be picking the winner with random.org on Monday, August 2nd.

For all those that do not win, you can still purchase they awesome, amazing stamps.  They are high quality photopolymer and stamp beautifully.  I just love them!  Not to mention how cute the phrases are!  These stamps will ship first class to the US and internationally or will be shipped Priority Mail.  Click here and you'll be taken to Joy's site. 


Again, leave me a comment on this post.  Thank you for visiting and I hope everyone is having a fabulous summer!

Happy Crafting,
~Amanda

July 26, 2010

Giveaway coming soon!!

I cannot believe I haven't updated this in a month!!!

Please visit me on Wednesday for the chance to win a great prize and see my newest project!  Until then....

Happy Crafting!

June 29, 2010

Father's Day card


Because I had so many father's day cards to make, I tried to keep them simple.  I saw a shaped card like this on Emma's blog, My Creative Time.  I had these adorable Bee sentiments from Papertrey Ink that I've been wanting to use so here we are....a father's day card for my DH!  I should have taken a picture of the inside since I used the stamp that says "Your hive or mine?"  My husband got a laugh out of it. :)  And while sparklies are not very manly, I can't help but put stickles on everything!! Including this card...


Supplies used:
Paper/Cardstock from DCWV, The Paper Company, and Cardstockonline.net
Stamps used: Honey Bee sentiments from PTI; Lots of dots and bee stamp (on the inside) from Clear Dollar Stamps
Create a Critter Cricut Cartridge
Stickles!

June 27, 2010

A simple Thank You card


I cannot believe it has been so long since I've posted, especially since I've made a ton of projects.  June is birthday month in my family (actually everyone's birthday is in June except mine) and that combined with Father's Day (for my dad and 2 father in laws) it has been so hectic around here!  My kids have been a huge help though since they've been home from school.

During the first part of June, my husband and son went on a scouting campout.  He asked me to make a Thank you card for the family that allowed them to stay on their property.  I needed something simple and quick since I had so much else to do this month.  I decided to use this card from the Wild Card cricut cartridge.  It can be easily customized with any colors for anyone and any occassion.  I used blue and yellow/gold because those are cub scout colors.  The tag on the front was from Tags, Bags, Boxes, & More and the stamp was from a Fiskars baby set.  I used my gypsy to customize it to fit an A2 sized card and also made a matching envelope.  I will definitely be using it again (in colors I like better next time) 
 

June 11, 2010

Card for Throwback Thursday Challenge on 'My Creative Time'


I have been following Emma on My Creative Time for awhile now and I was so excited when she started doing challenges!  This week was about Stretch your imagination, however as you can see I didn't use that one.  The challenge was to use Red, blue, and brown.  Here's what came to mind while I was going through my brand new Wall Decor & More cartridge.  I made a card that actually has quite a bit of dimension and lots of layers, and trust me, looks MUCH better in person.  I did some techniques on this card (like wet embossing and inking on the edges of the waves as well as decorating the inside (which is not pictured at the moment).  Anyway, supplies used are paper/cardstock (all scraps so I have no idea what was what), embossing pad and heat gun, Wall Decor and More cricut cartridge, white gel pen, brown marker and lots of glue!

Happy Crafting!

Bee Mine Card with "Lots of Pun" stamp set from Joy's Life


I am so thrilled to be given the opportunity to work with Joy's stamps. They are awesome! The stamped images came out so clear you would have thought I printed them on my printer! "Lots of Pun" is full of cute, adorable phrases that go perfectly with the Create a Critter Cricut cartridge, however, I must say I can think of about a hundred more uses for them with other cartridges. For my first project I created this card. I just love the Bee on the Create a Critter cartridge. The card base is from the Elephant button phrase feature. I welded two of them together. The rainbow is also from this same cartridge on the sun button. Cardstock is from several places including DCWV and My Mind's Eye. I added a bow and lots of Stickles....I LOVE Stickles!

If you want, you can buy these stamps here.  You won't be disappointed!

May 31, 2010

Handmade Birthday Gift

I had a really great weekend!  I got to take lots of pictures of my niece.  I miss babies being that small.  Oliver no longer will sit still for me, but here's a couple pictures of them.  I just LOVE the lens I got for my birthday.  It really does well.

Here also are what I created.  I made the box myself.  It was a 6x6x1.5 box that I filled with goodies for my sister to scrapbook with. I used a lot of blue and orange because she likes those colors.  The extra colors I added came out a little funky but it was a learning experience. :) I also made the card using the Straight From the Nest Cricut Cartridge.  


May 27, 2010

Exciting news and a Giveaway!!

I was so completely thrilled this week when I found out that I had been selected to be a Joy's Life Featured Designer!  I will soon be creating away with her new stamp set "Lots of Pun".  They are too too cute and go great with the Create a Critter cricut cartridge.   They can also be used in all kinds of other ways and my head is just spinning with ideas!  Here's what they look like:


Aren't they just adorable????  Oh I just can't wait to get my hands on them.  You can get your hands on them too!  Joy is celebrating 300,000 hits on her blog and is giving away one of these "Lots of Pun" stamp sets!  All you have to do is follow this link for the giveaway.  If you aren't one of the lucky winners, you can also purchase her stamp set by following this link.  If you go to her product site you'll also notice she's going to have a DVD on using vinyl with the Cricut.  I am SUPER ecstatic about that!!!  I can't wait to buy it! 

Later this week I'll have a cute project to post but can't do it yet in case the person that it is intended for reads this :)

May 26, 2010

Tweet Day!


I don't often enter things with my cards but I saw this sketch on Card Patterns and thought it was just so cute.

Here is my card:


Digi stamp and sentiment are from AiFactory.  White cardstock from Papertrey Ink.  All other cardstock and patterned paper from DCWV.  I colored it in with my copic markers and added some buttons and ribbon and viola! 

May 24, 2010

Birthday goodies!


Since life if finally starting to slow down a bit I actually have a chance to post about these!  My daughter wanted something special for goodies for her overnight guests and after she saw the video on http://www.mypinkstamper.com/ using the Forever Young cartridge to make a purse with cards we knew that's what we wanted to do.  Since I do not have that cartridge, I turned to my trusty Plantin Schoolbook cartridge.  I wanted to make 3x3 cards with envelopes to go in the bags so I used my Gypsy to manipulate the bag to accomodate a square card, rather than a rectangle.  I also used the Create a Critter cartridge for the cute flowers on the front.  I ran the blue cardstock through my Cuttlebug using the Swiss Dots folder and I think that helped dress it up a little.  The cards were all made basically from scraps that I had.  The stamps on them are from Clear Dollar Stamps and the sentiments were from Papertrey Ink.  It was a lot of work putting them together but I think they came out pretty cute :)